|
|
|
|
|
|
|
|
|
Introduction Figs are among the easiest trees to propagate. They can be grown from seed, cuttings of branches, cuttings of roots, air-layers, and by grafting. Growing from Seed Unless you live in the tropics seeds of figs are relatively unavailable. Figs grown in the north and indoors will not have viable seed. Viable seed requires the fig to be fertilized by its own parasitic fig wasp. The edible fig, Ficus carica, sets fertile seed without any wasp being involved. I will not discuss growing from seed except to say the seed is very fine and can be placed on moistened chopped sphagnum moss and kept in a moist environment until germination occurs. Seedlings can then be pricked out and potted into individual pots and grown on after the fourth leaf is out. Seedlings are tiny but grow fairly quickly after the slow initial phase. Growing from Cuttings The technique that is almost foolproof is to take a cutting of a healthy, vigorously growing fig. This cutting should have some woody material at the base rather than a totally green twig.
A hardwood cutting is more likely to root while the green or soft-wood cutting seems more likely to rot. The cutting is immediately placed into a porous soil mix which is then moistened. One to two inches of stem is inserted into the soil.
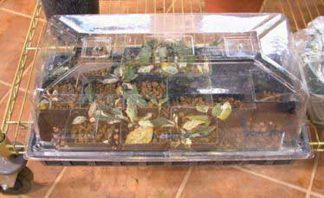
The cutting in the pot is then sealed into a clear plastic bag.
Less preferable is a plastic commercially available "hot house" as these seem to dry out faster. Place the bagged cutting in indirect light but never full sunlight or the cutting will "cook". Ficus cuttings of 4 inch caliper or even more can be rooted. Cuttings may also be rooted in water, but the success rate seems to be less than the baggy technique and rooting may be more uneven.
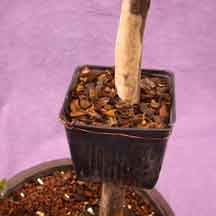
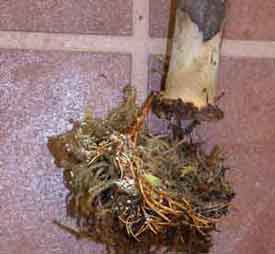
A cutting of a root section may also be used as simply as a branch cutting. Leave most of the root buried except for the top one inch of its "stem".
Plant this root cutting as you do for a stem cutting. A root cutting will take longer to sprout foliage off its top or cut end, 60-120 days or more, while a branch cutting typically takes 30-60 days. The plant may be removed form the baggy after roots emerge from the bottom of the pot or after 3 to 5 leaves emerge from the cutting. The tree many then be placed gradually into direct sunlight and watered and fertilized normally.
While cuttings are in the baggy they should be watered only when the soil surface dries or if there is no moisture evident as condensation on the inside of the plastic bag. Watering may be needed every 7 days or sooner. Open the baggy weekly for 5-10 minutes to allow some moisture out,. This keeps fungal problems down to a minimum. Always remove dead or yellowing leaves to keep mold under control. Problems
getting cuttings to root Growing
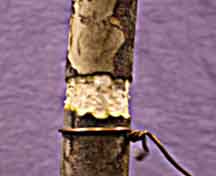
from Air Layers Air layers are most successful when the tree is in active growth. A suitable section of tree is selected and a girdle of the bark and cambium and softwood is removed equal in thickness to the branch's diameter. The bark and cambium is taken down to the hardwood of the stem.
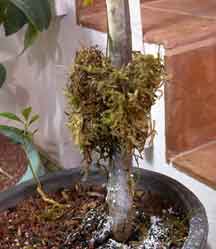
If too narrow a strip is removed the tree will heal over the wound and roots will not form. It takes some 90-120 days to get the roots to develop. Once the trough is formed place moistened, long-fibered sphagnum moss around the wound and wrap it in plastic, or use a plastic pot which has been split in half, secured to the trunk and filled with bonsai soil mix.
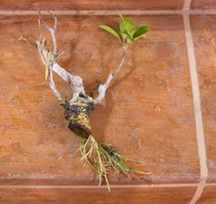
Rooting hormones may be dusted onto the grooved area before the moss is applied. Keep the tree in its usual situation and be sure to keep the moss moistened. If needed moisten the moss and never allow it to dry out. Once roots fill the bag, as seen through the plastic, the layer may be sawed off below the roots. Gently remove the plastic but do not cut off or remove the moss. The newly formed roots are very delicate and will break off with very little manipulation.
Simply pot the airlayer into your usual bonsai mix, and allow it to grow for 6 months. On repotting gently straighten the roots and remove any excess moss. Treat the new tree as any other newly transplanted bonsai. (Note the above sequence was a layer of a Caesalpina ferrea and not a fig. Figs layer much more easily and evenly.) Conclusion Click here for more information on Grafting Your Fig. |


 .
.